In December of 2023 I started work on the Fanhome DeAgostini Millennium Falcon model kit. It's a subscription based replica of the 3 foot filming "miniature" from The Empire Strikes Back. The kit is spaced out over 100 issues, every month you get about 5 of them, so the whole build will take 2 years. Each issue comes with an assortment of parts and a small magazine - half of which is about Star Wars lore, and the other half is assembly instructions. The kit is painted, but nowhere near where it should be, so expect to do a full paint job on top of assembly.
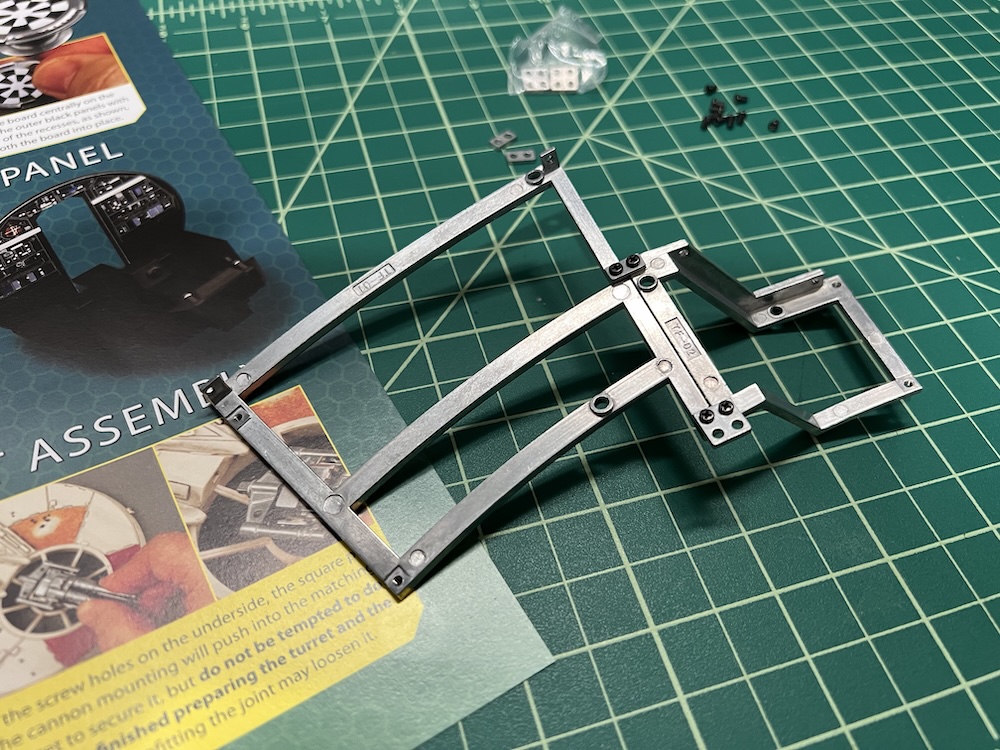
The first box is a great example tutorial of how the entire build will go - it contains a few small sections of the metal frame, the top turret hull piece, and pieces of the cockpit. This gives you a good idea of what kind of skills will be required for assembly.
December 31st, 2023
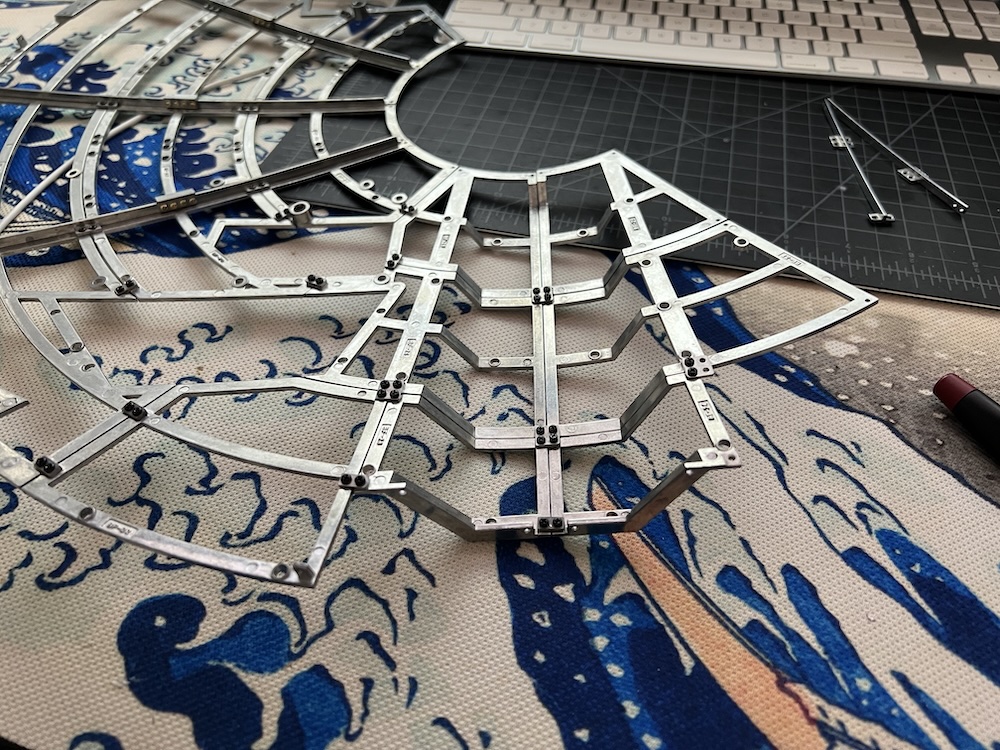
Assembly begins - I started with two small pieces of the upper frame - how do you eat an elephant? One bite at a time! It's going to be a long journey.
September 17th, 2024
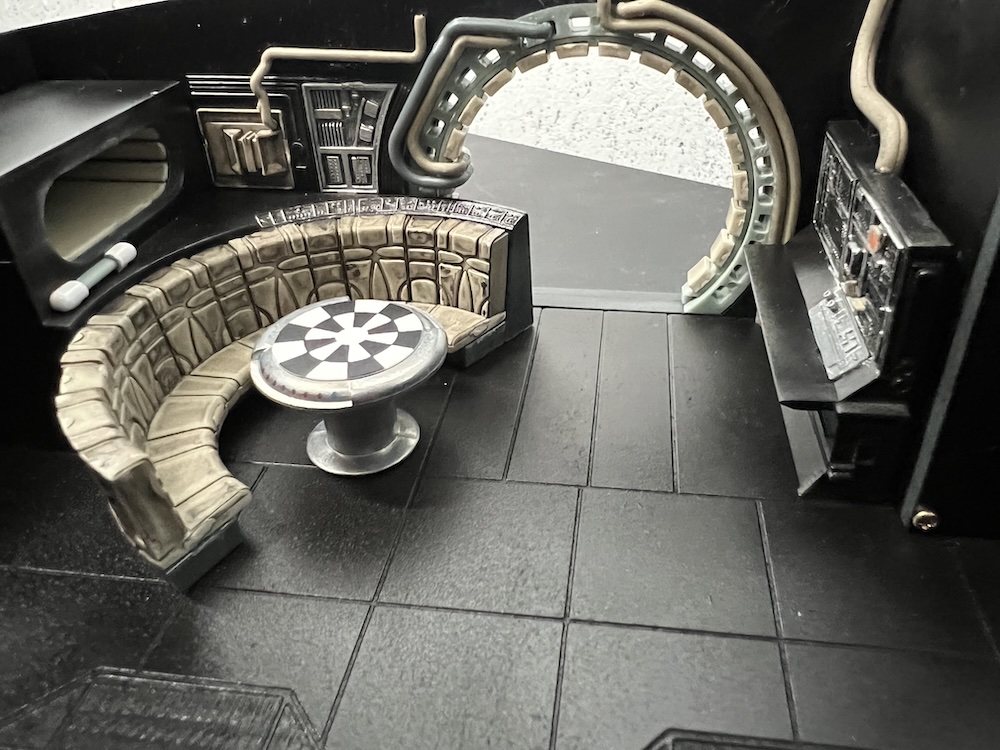
The main living area interior is coming together nicely. There are actually upgrades you can get to replace the floor with actual metal grates, but I don't plan on displaying the full build with the top hull off looking inside, so I kept it stock. I did paint the flooring a bit darker, the original was a dull gray. I started practicing dry brushing on some of the science console details and the wall panels with some success. Going to need a lot more practice before I start doing exterior paints.
Each issue has been coming with a few pieces of the lower frame, so things are taking shape. For your convenience the kit also comes with plastic shells that snap together that you rest the kit on before everything is complete.
January 27th, 2025
Assembly continues, the lower frame is almost complete and the boarding ramp has been installed. I tested the ramp electronics and everything works great. I have to keep the wiring tucked away until further in the build process as the PCB board that sits in the rear of the model and battery pack haven't been installed yet.
February 16th, 2025
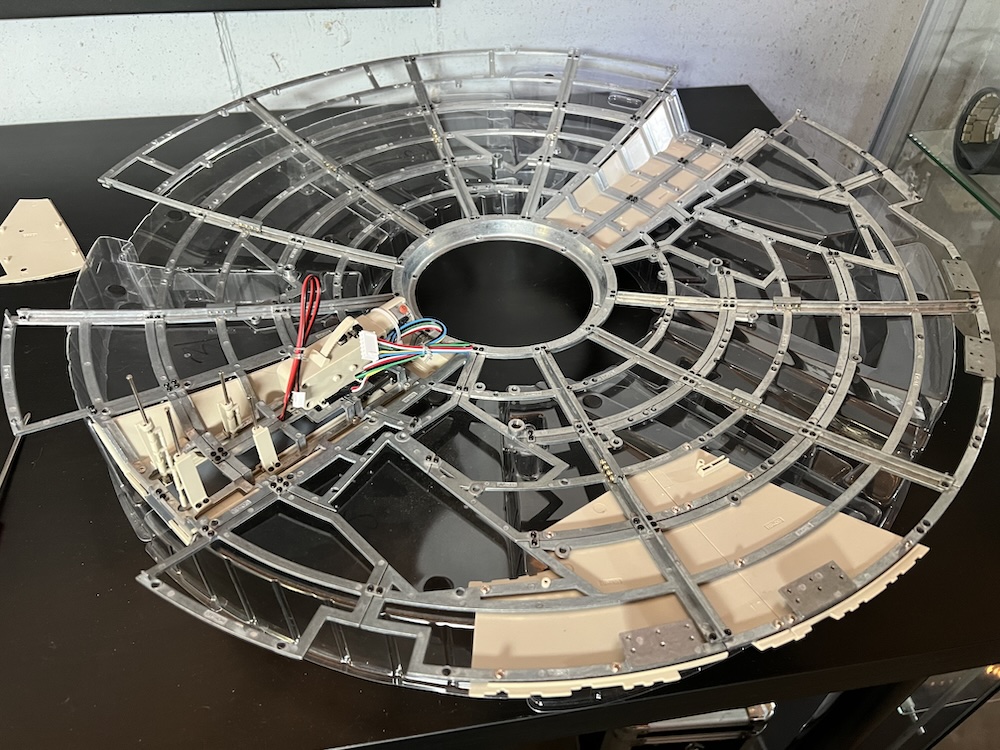
With the lower frame complete, the bottom hull panels are almost completely installed. The panels screw onto the metal frame so the entire thing feels extremely stiff.
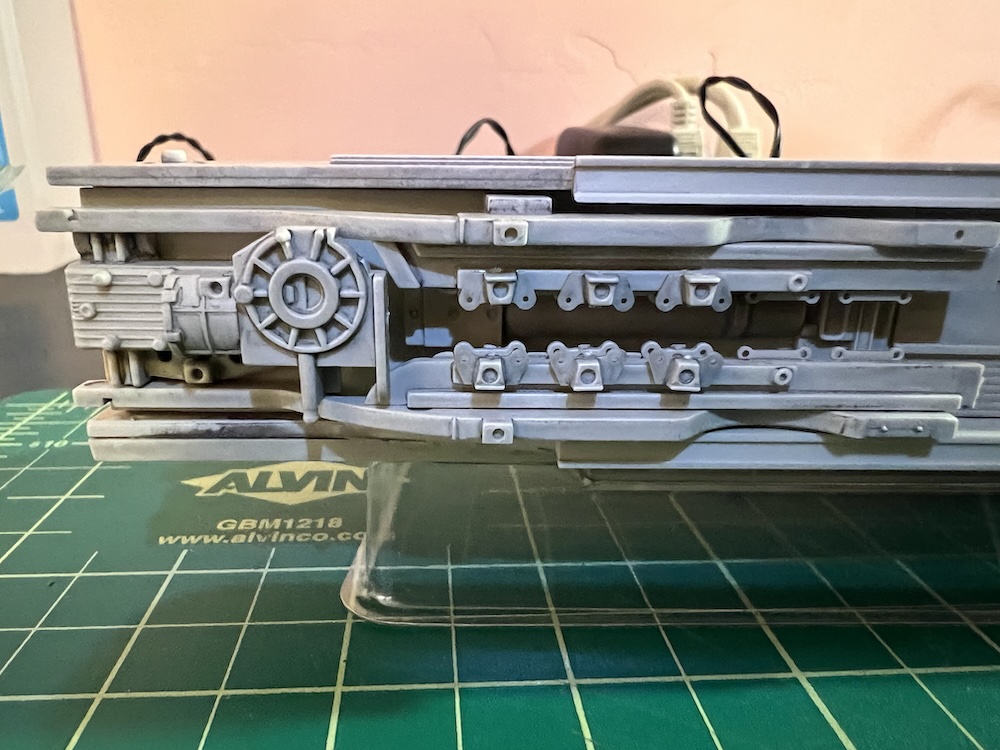
Once the hull was complete, some of the lower engine greeblies started going on. Some people could find this tedious, but I love putting on all the fine details - some of which were extremely tricky to get on. The thrust vector arms for the engine outlet don't go on until much later in the kit.
May 6th, 2025
The lower frame and hull complete for now, the top frame is now done with some of the hull installed. Notice the PCB for the electronics is installed in the lower frame, and the cutout in the top frame to see into the living area when you remove some of the top frame - a portion of the top hull is attached by magnets and snaps in place.
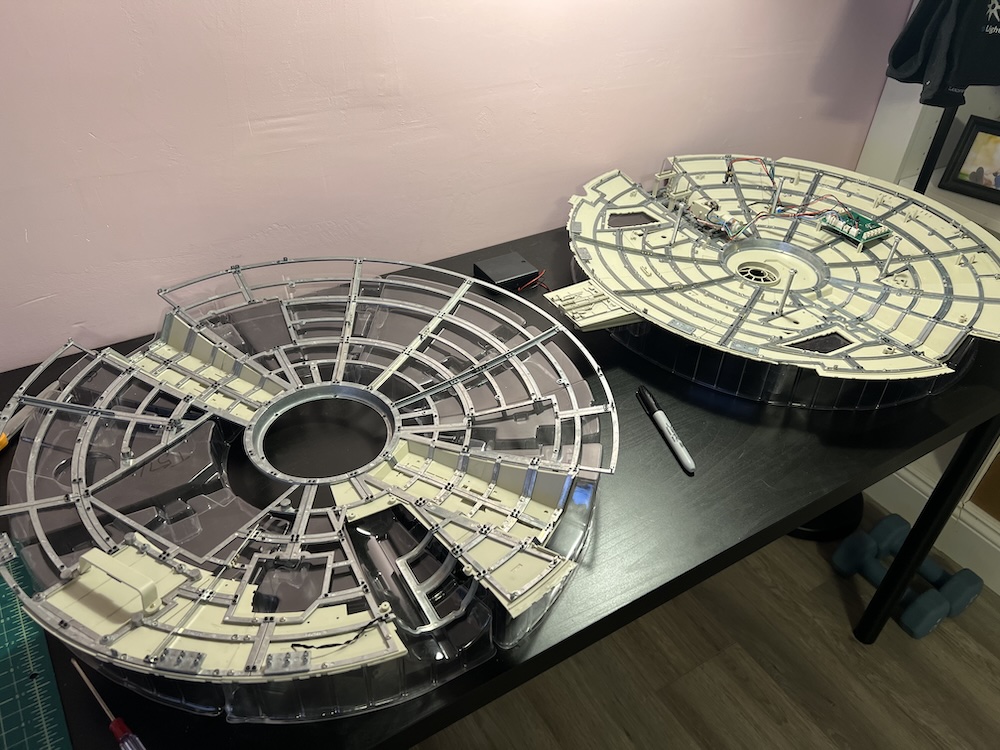
May 15th, 2025
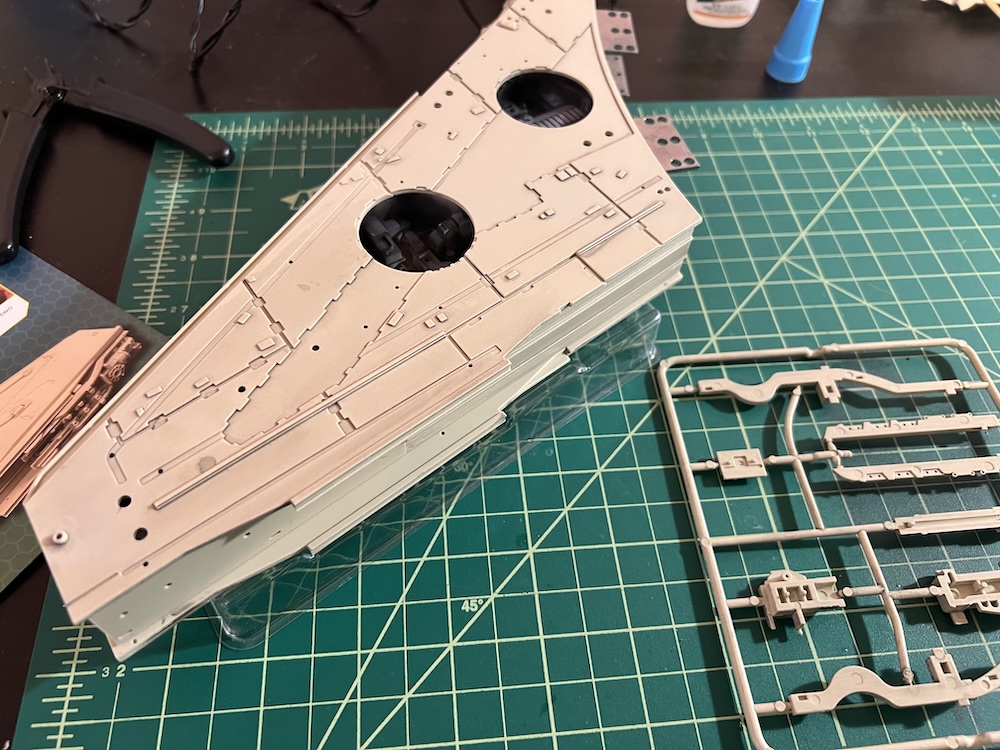
The top hull panels are all in place, with the panel for the engine exhaust ports still not attached. I need to paint the maintenance pits and attach them to the hull at some point.

June 6th, 2025
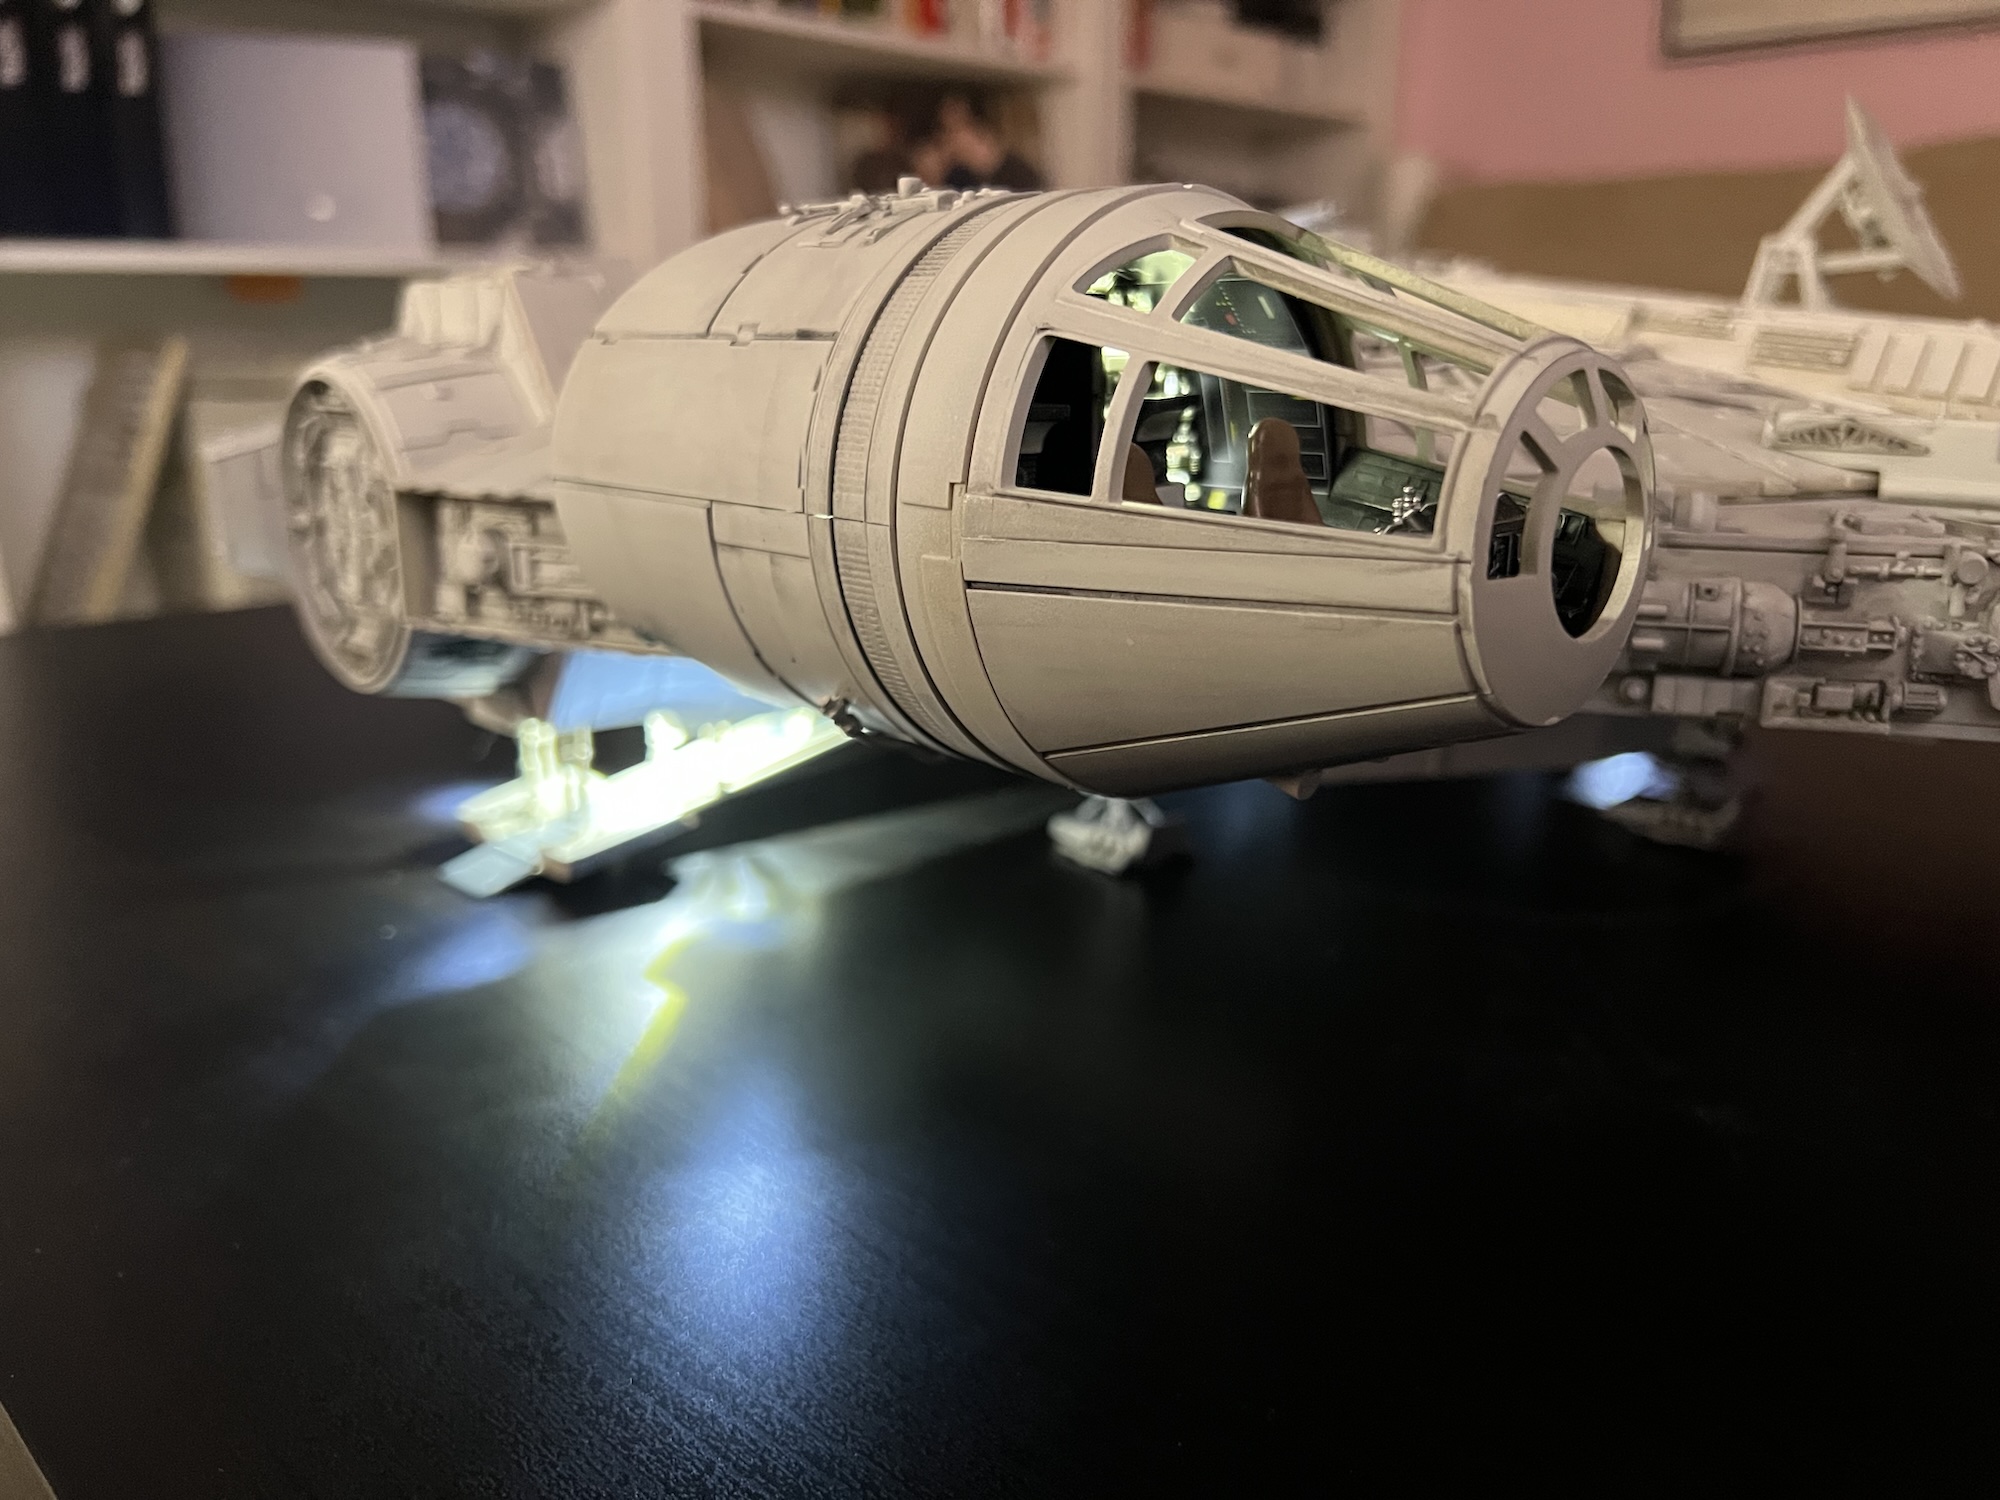
The port side mandible is now assembled with the greeblies for the sides installed. The top maintenance pits are painted but still waiting on the greeblies for the top. One challenge was installing the headlight and snaking the wire through the mandible.
June 12th, 2025
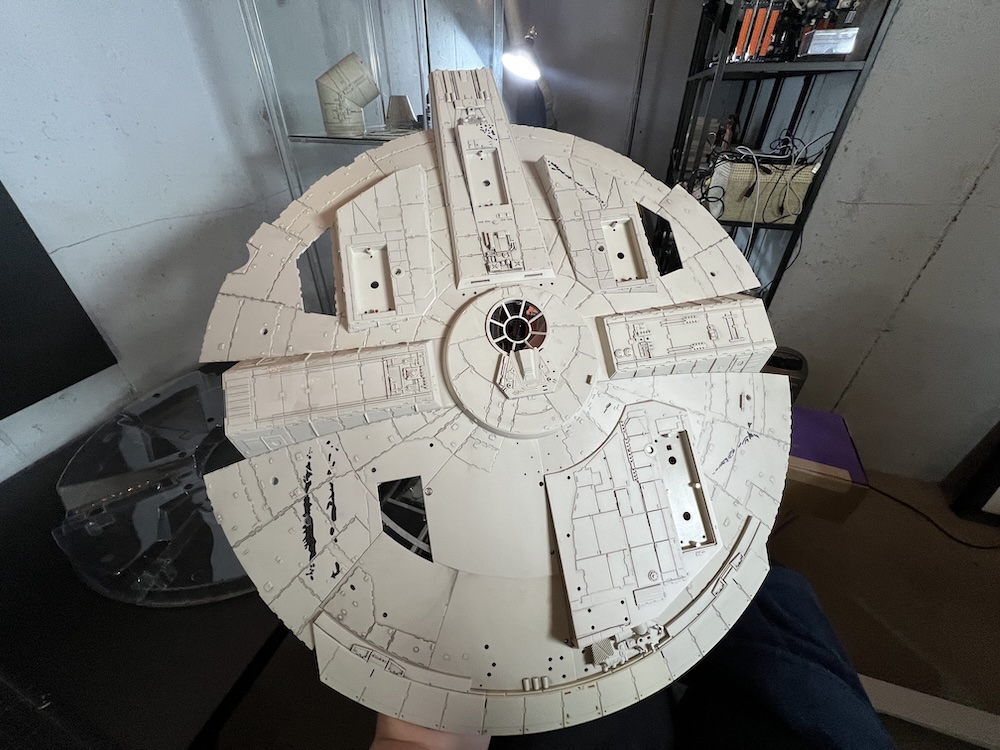
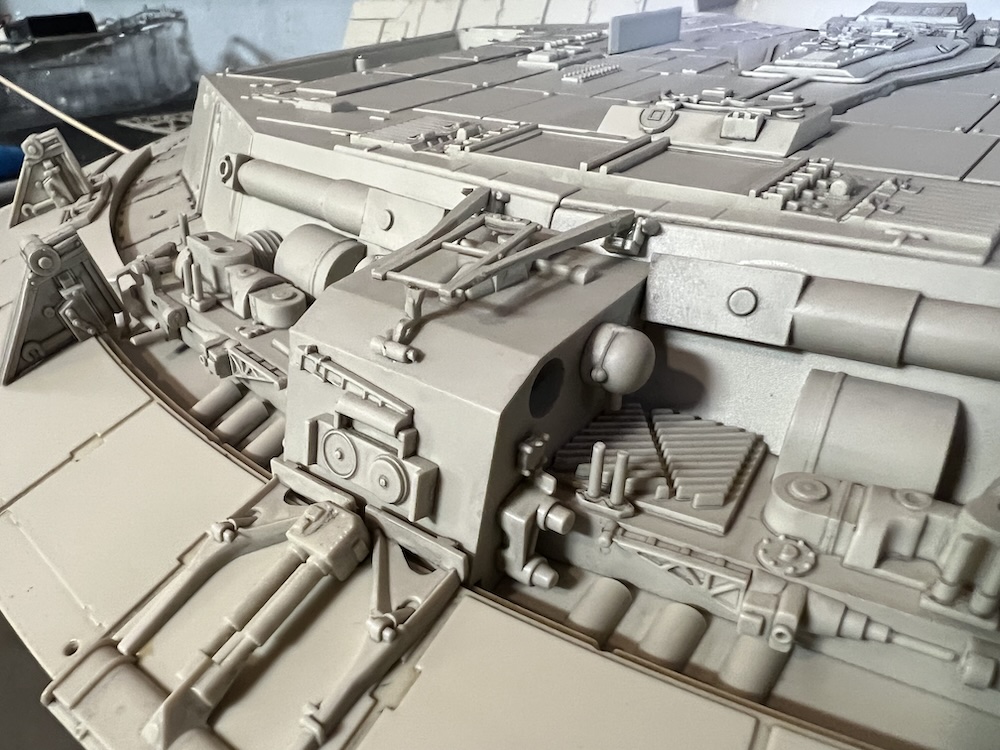
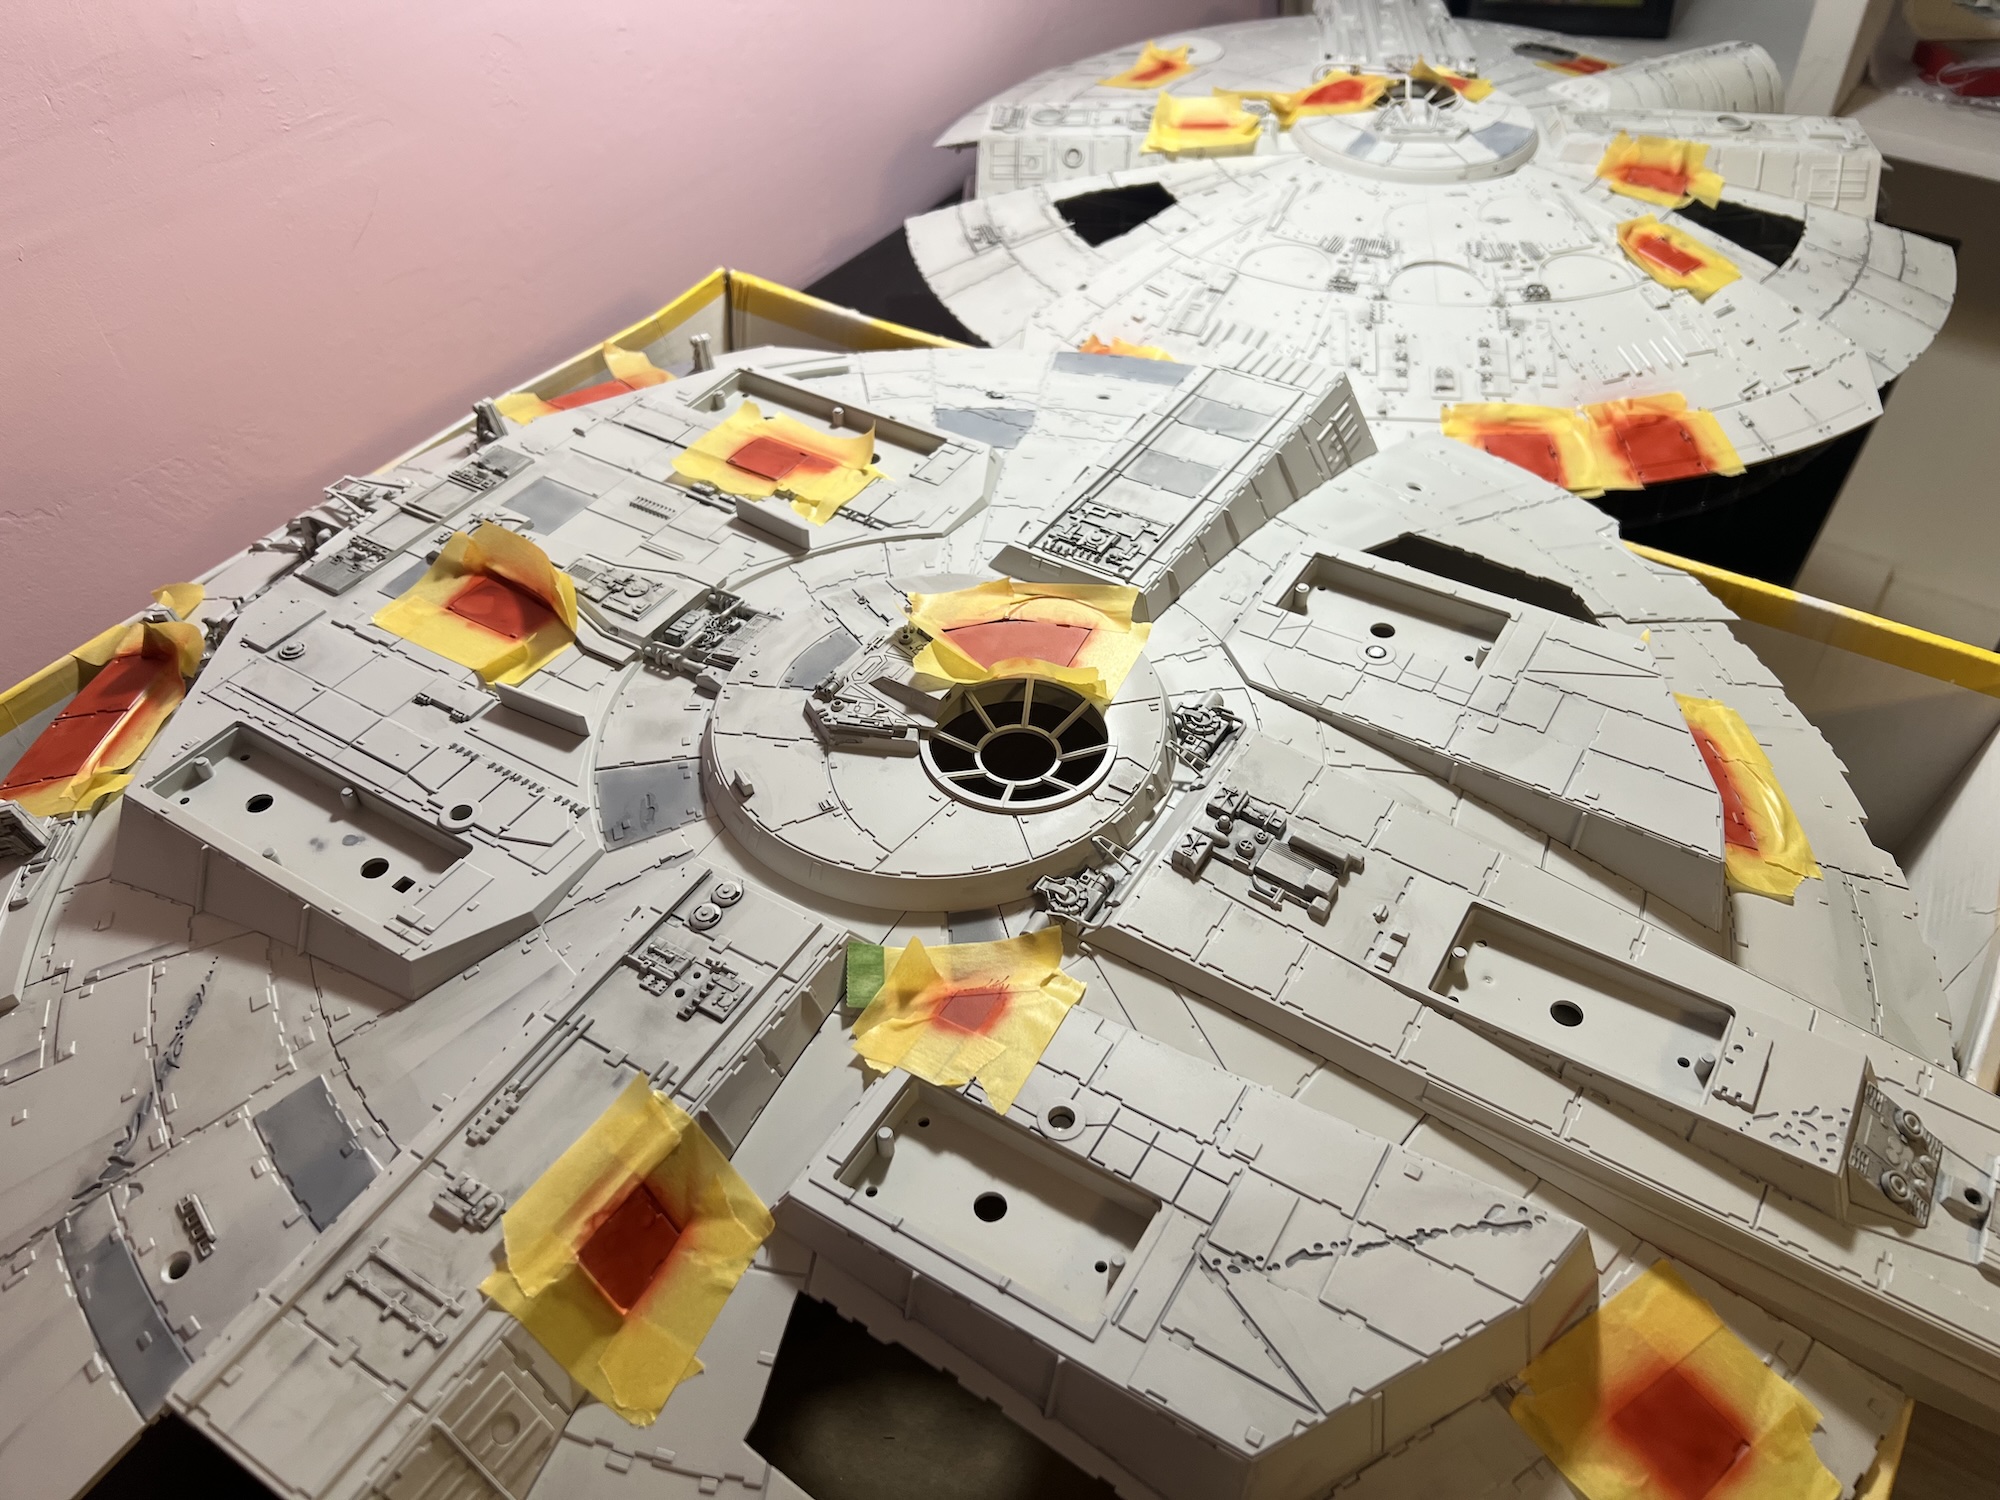
A huge milestone is reached - first coat of paint on the hull is starting. The paint job on the kit from the factory is ... okay I guess. I call it "smokers teeth yellow", and the details aren't realistic at all, notice the blaster marks by the rectenna, they're just dots. Once the base coat is on I will have to go in with a dremel to add some detail and then airbrush in realistic blast marks. Also I can't wait to get rid of that horrid yellow panel on the base of the blaster turret.

October 1st, 2025
Once I got a good base of Insignia White down on the entire upper and lower hulls plus the cockpit tube and other parts I was able to start adding the dark gray and red panel highlights. I've seen paint jobs on Falcon models go overboard on their weathering and paint jobs, but I wanted a more subtle look. I went with a very light gray, and wanted more of a burgundy red but my local hobby shop didn't have exactly what I wanted - the red turned out a bit brighter than I like, but with weathering and scraping it doesn't look too bad.
Once the accent panels were done I went in with a dirt wash and also airbrushed in the dirt streaks all along the hull. Again, I went with more of a subtle look, but the model looks 100x better than the paint job it shipped with. I added the scorched blaster marks with a dark gray base but it wasn't dark enough, so I went over it again with a black, and it really made them pop.
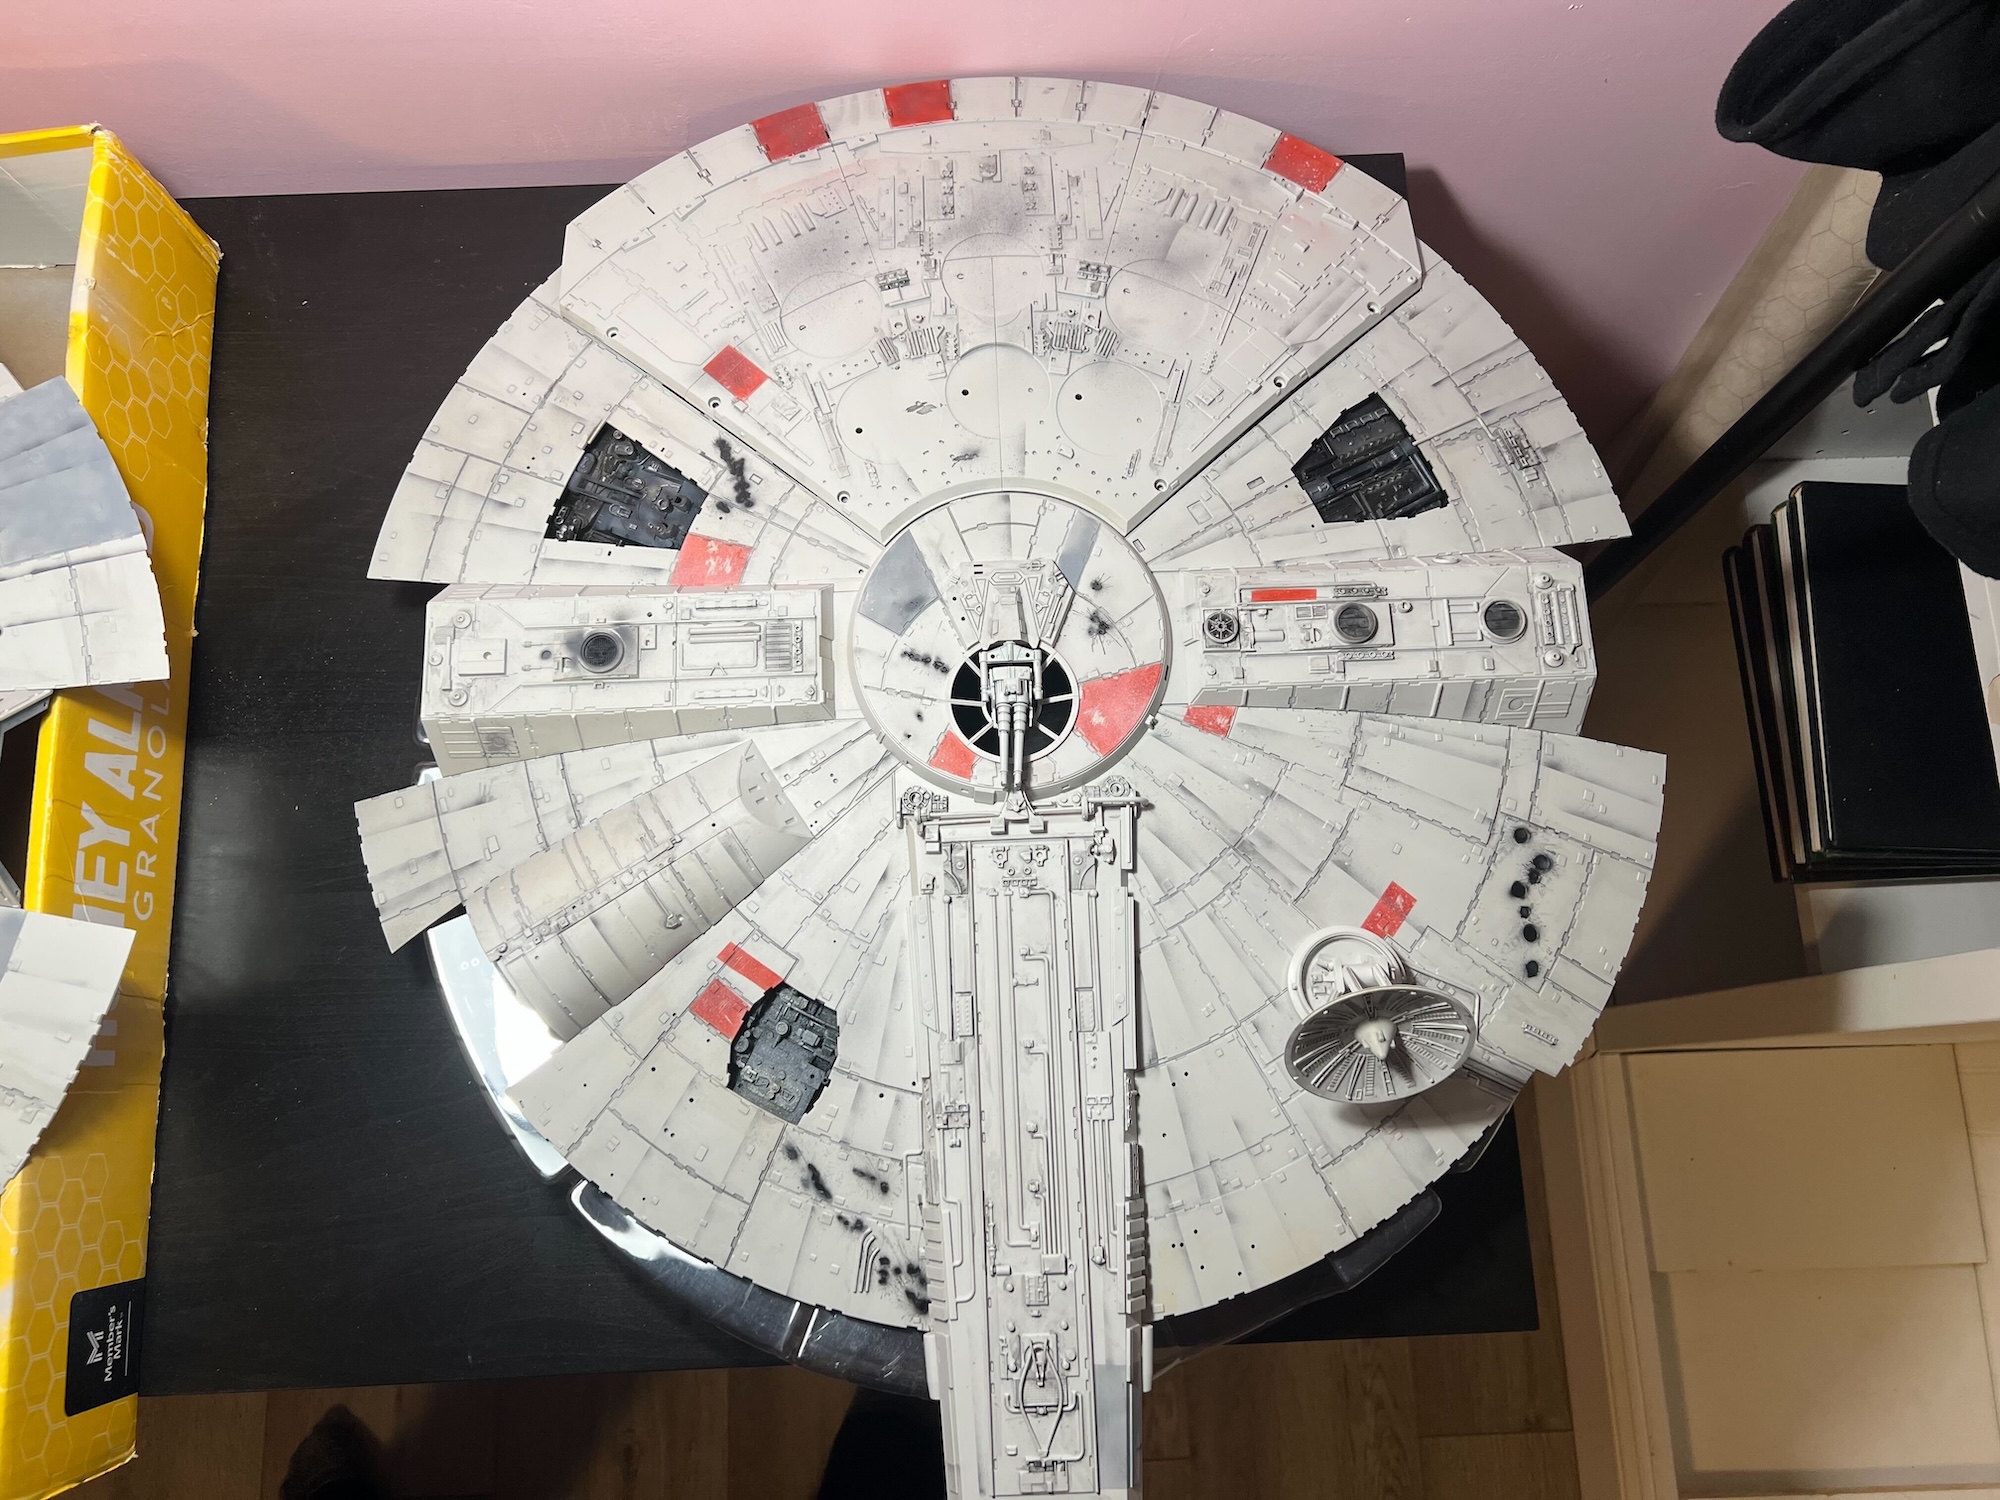
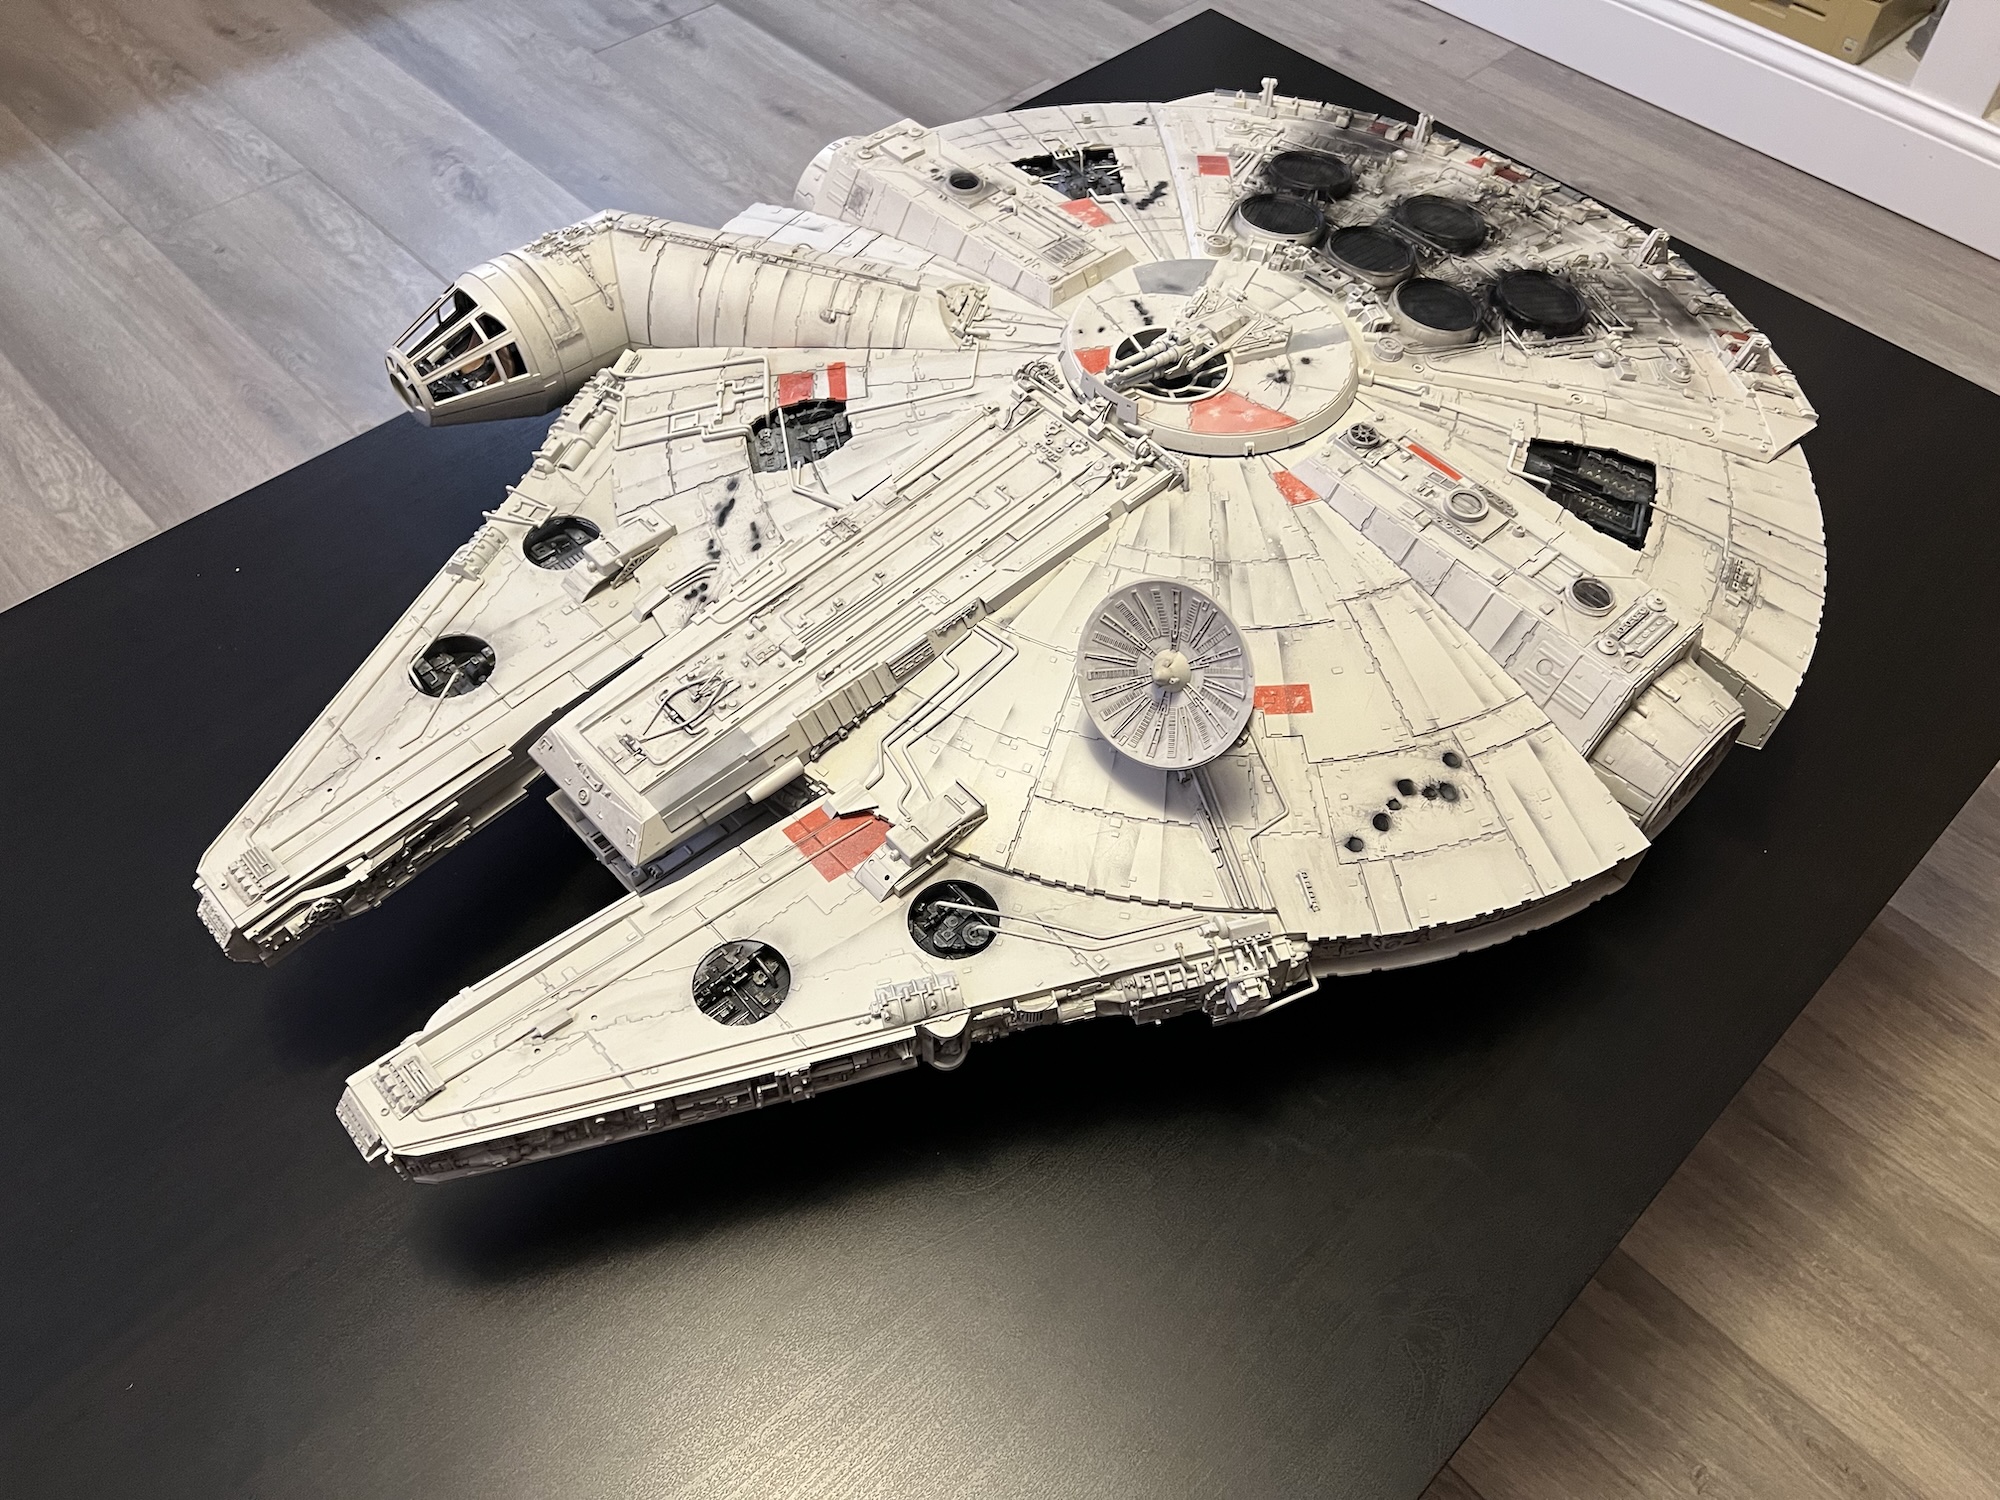
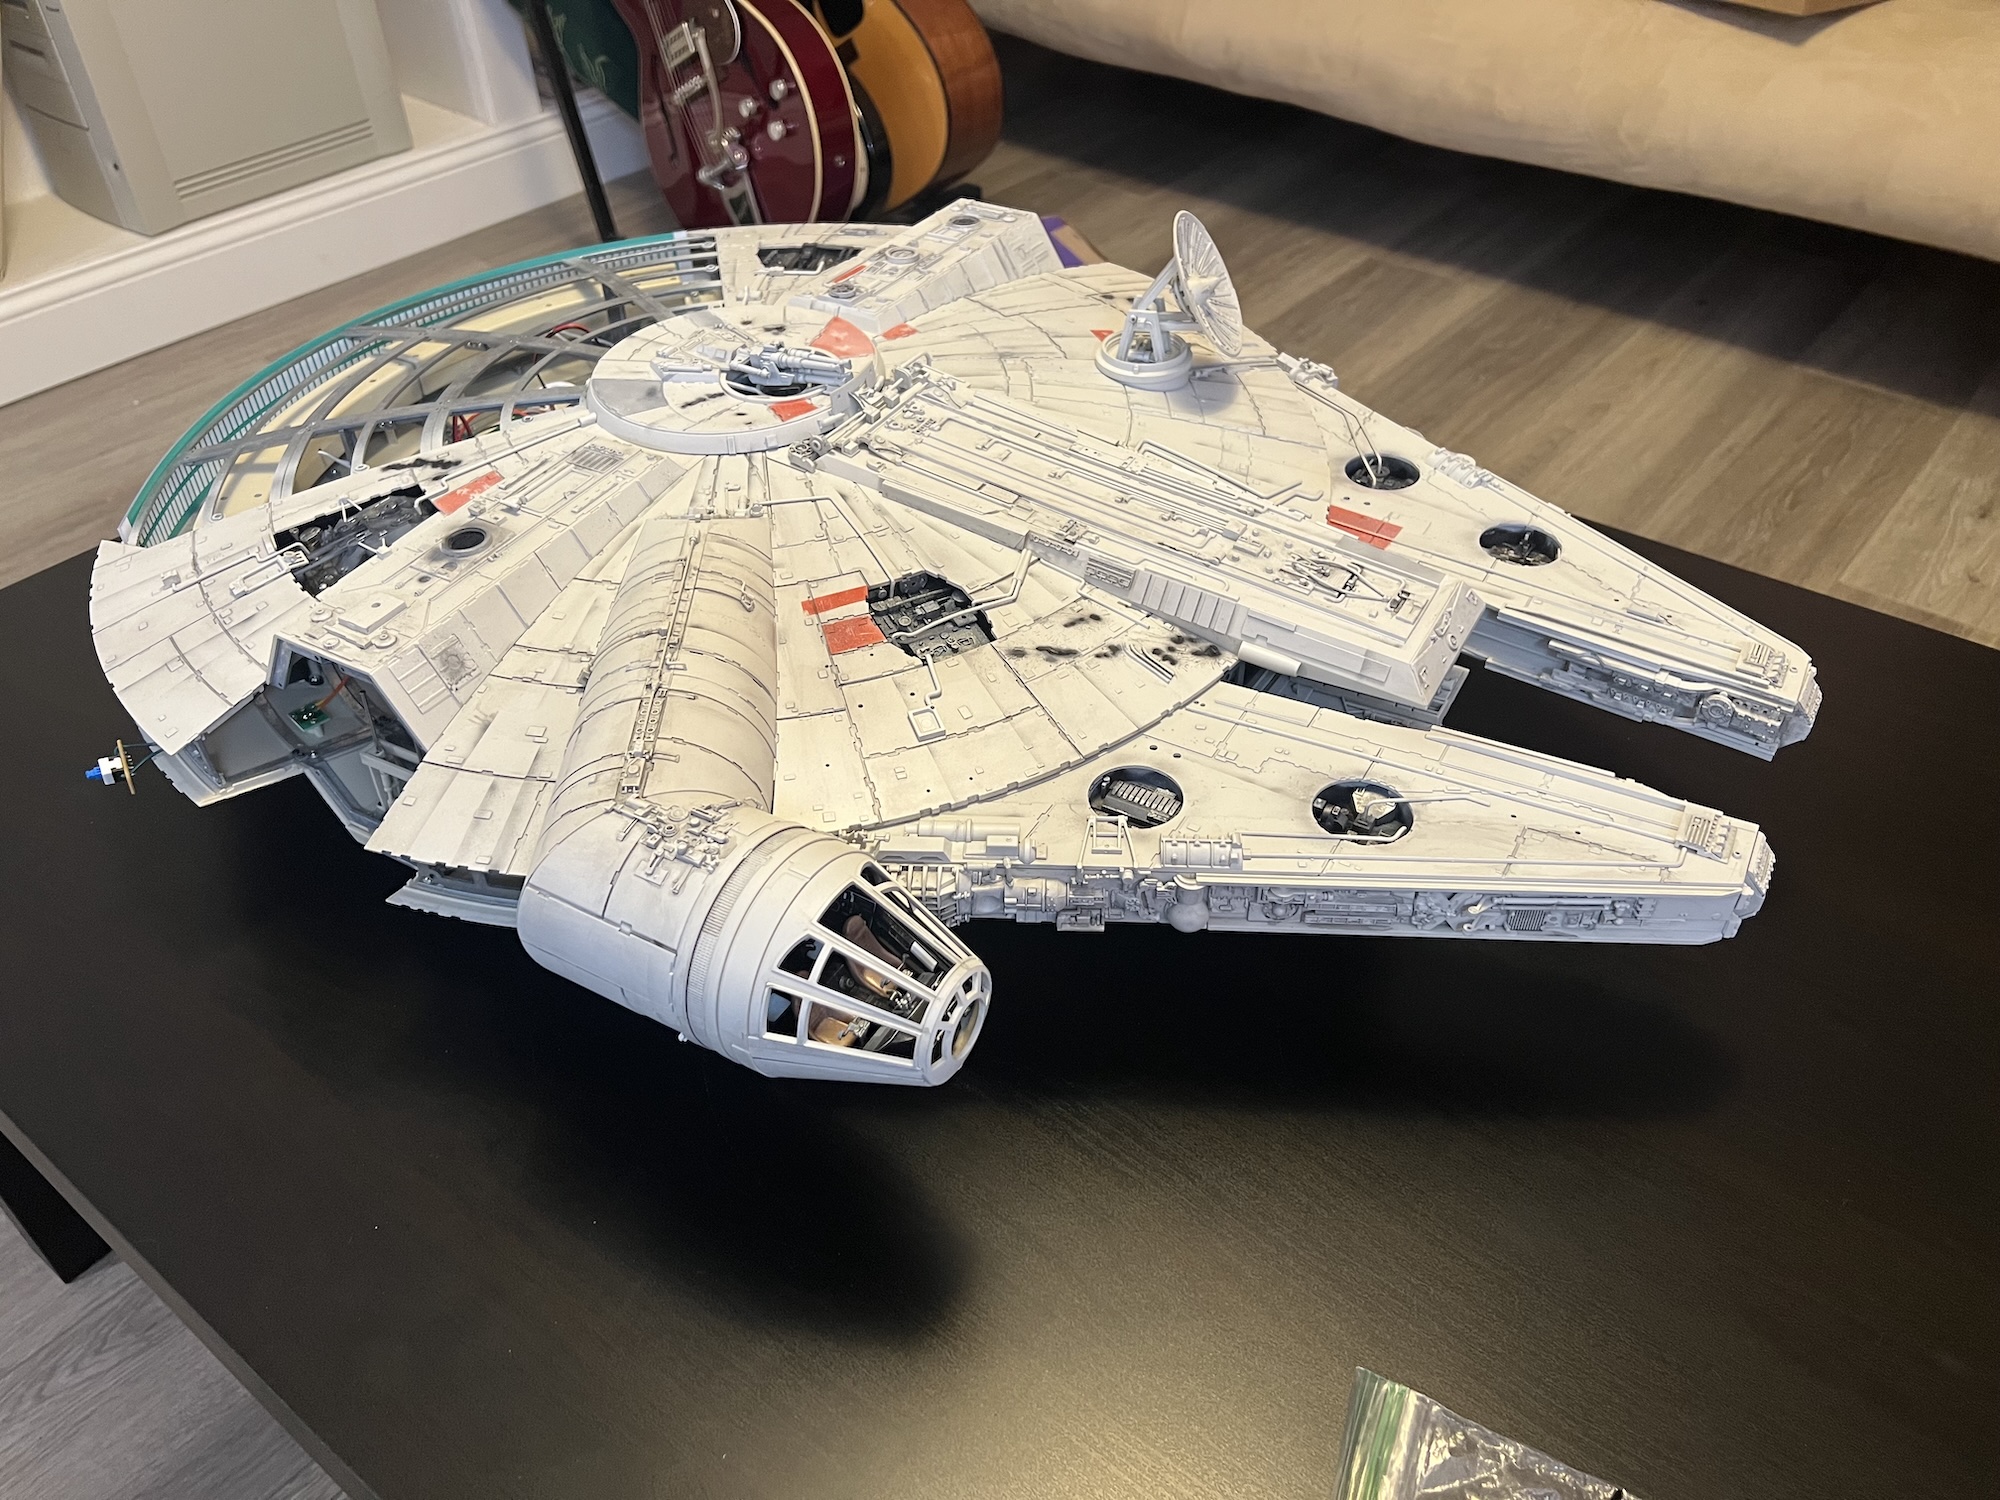
I am very happy how the weathering turned out, it was the biggest concern I had since my airbrush skills aren't the best. However, since the Millennium Falcon is dirty and beaten up, there's almost no wrong way to paint it. I wasn't hyper fixated on each streak and scorch like some people, but I love how it looks. At this point I'm up to about issue 90 of 100, and am sprinting towards the finish line. I got the mandibles mounted to the lower frame and also temporarily got the interior set up.
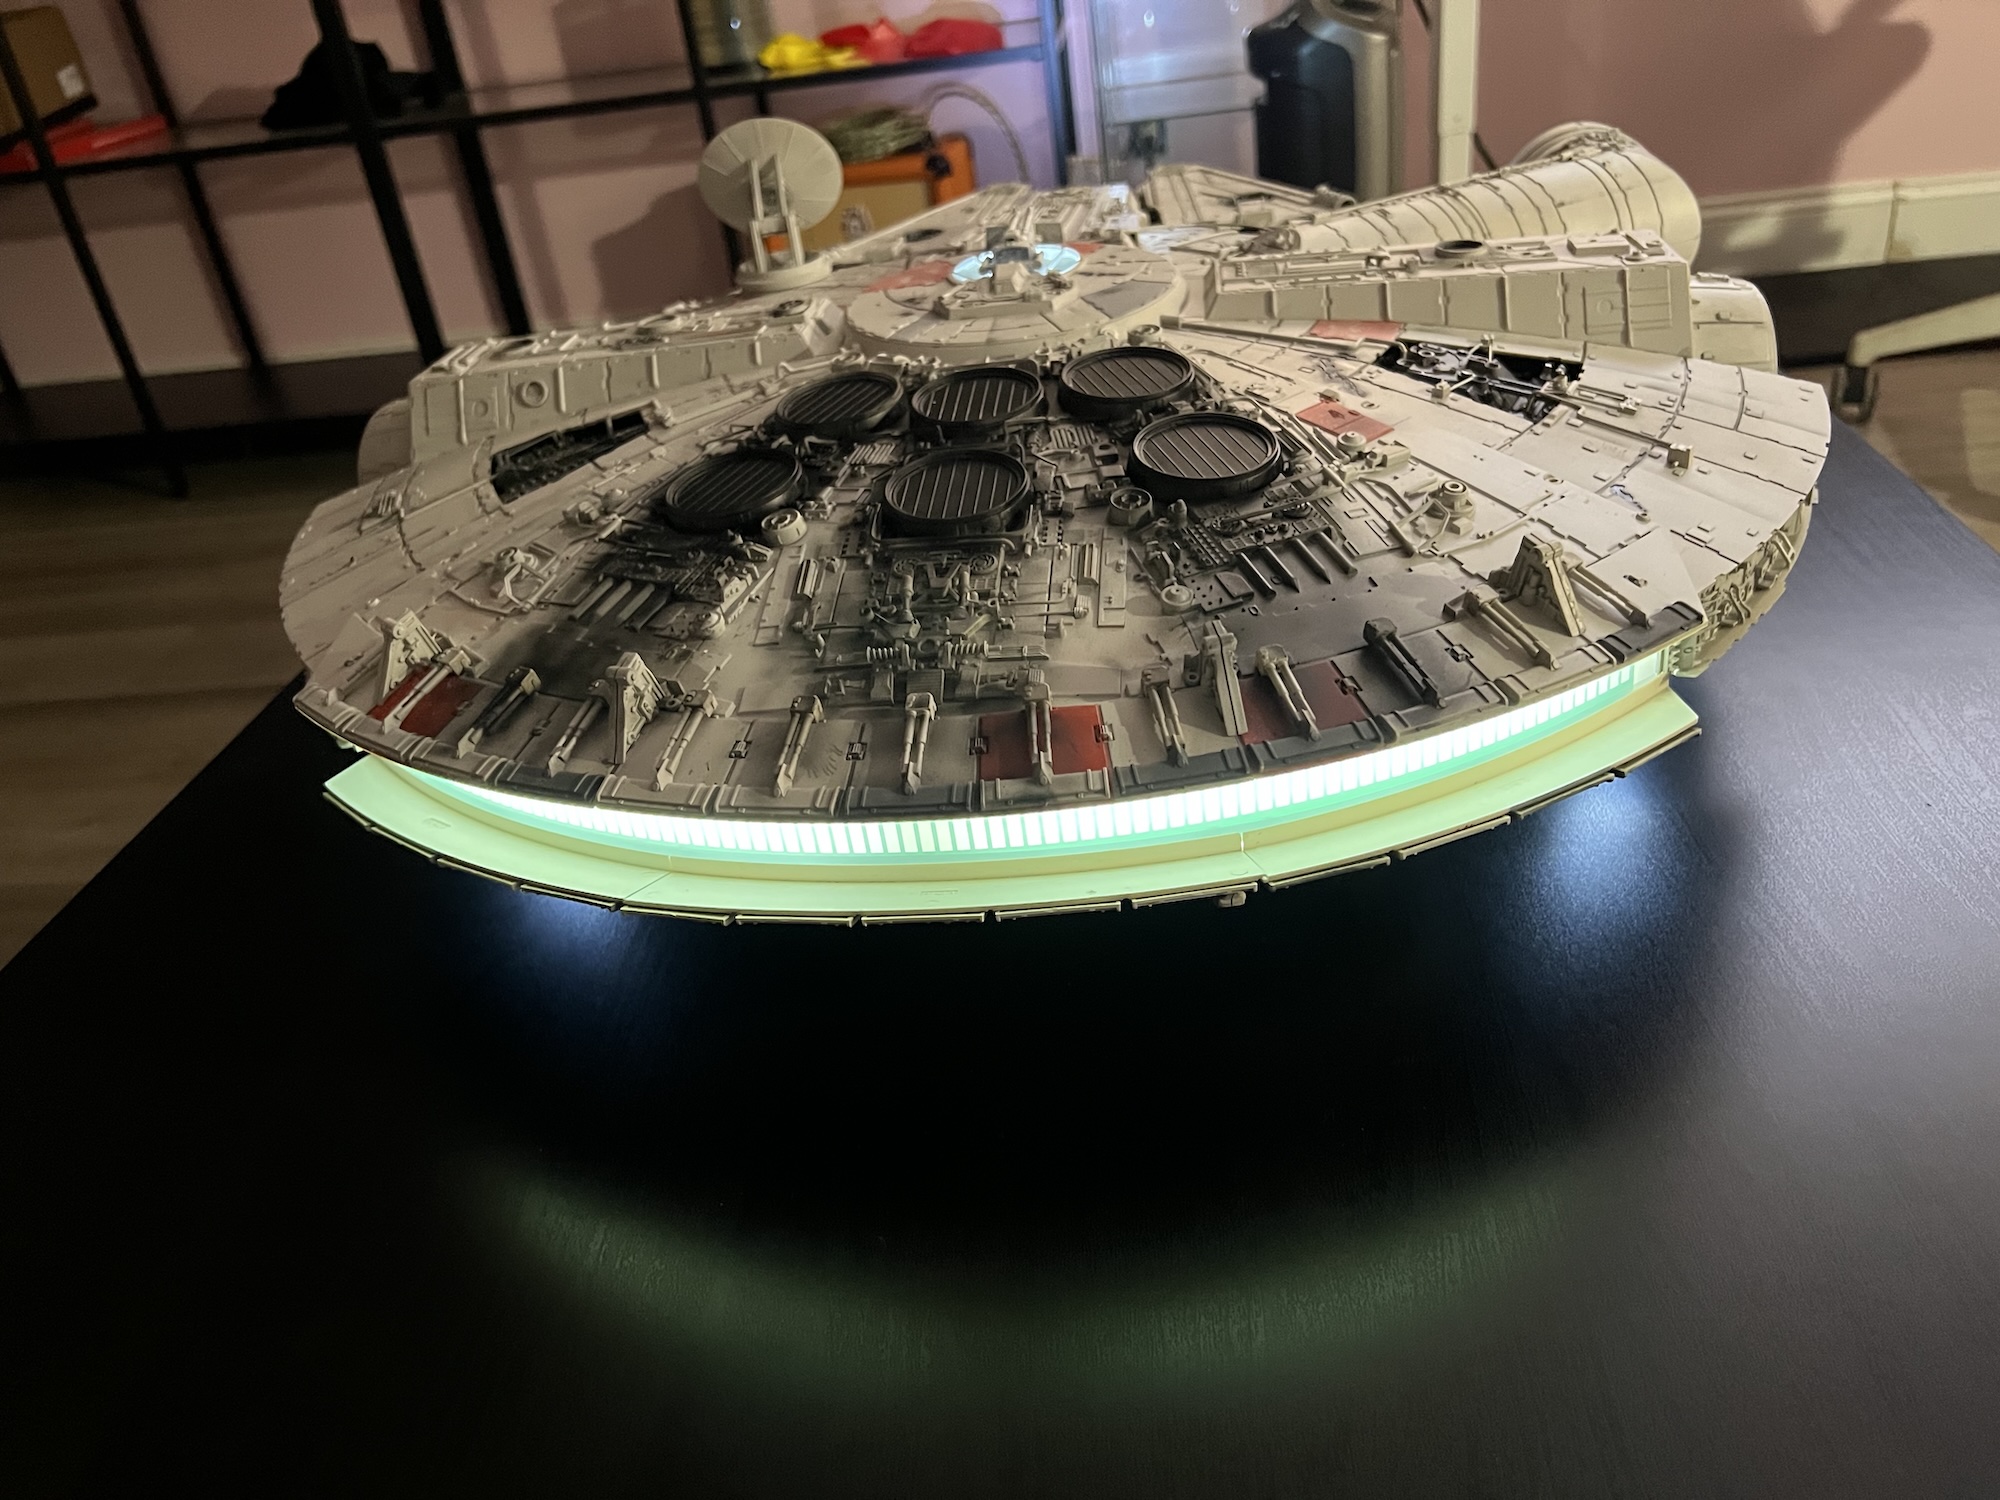
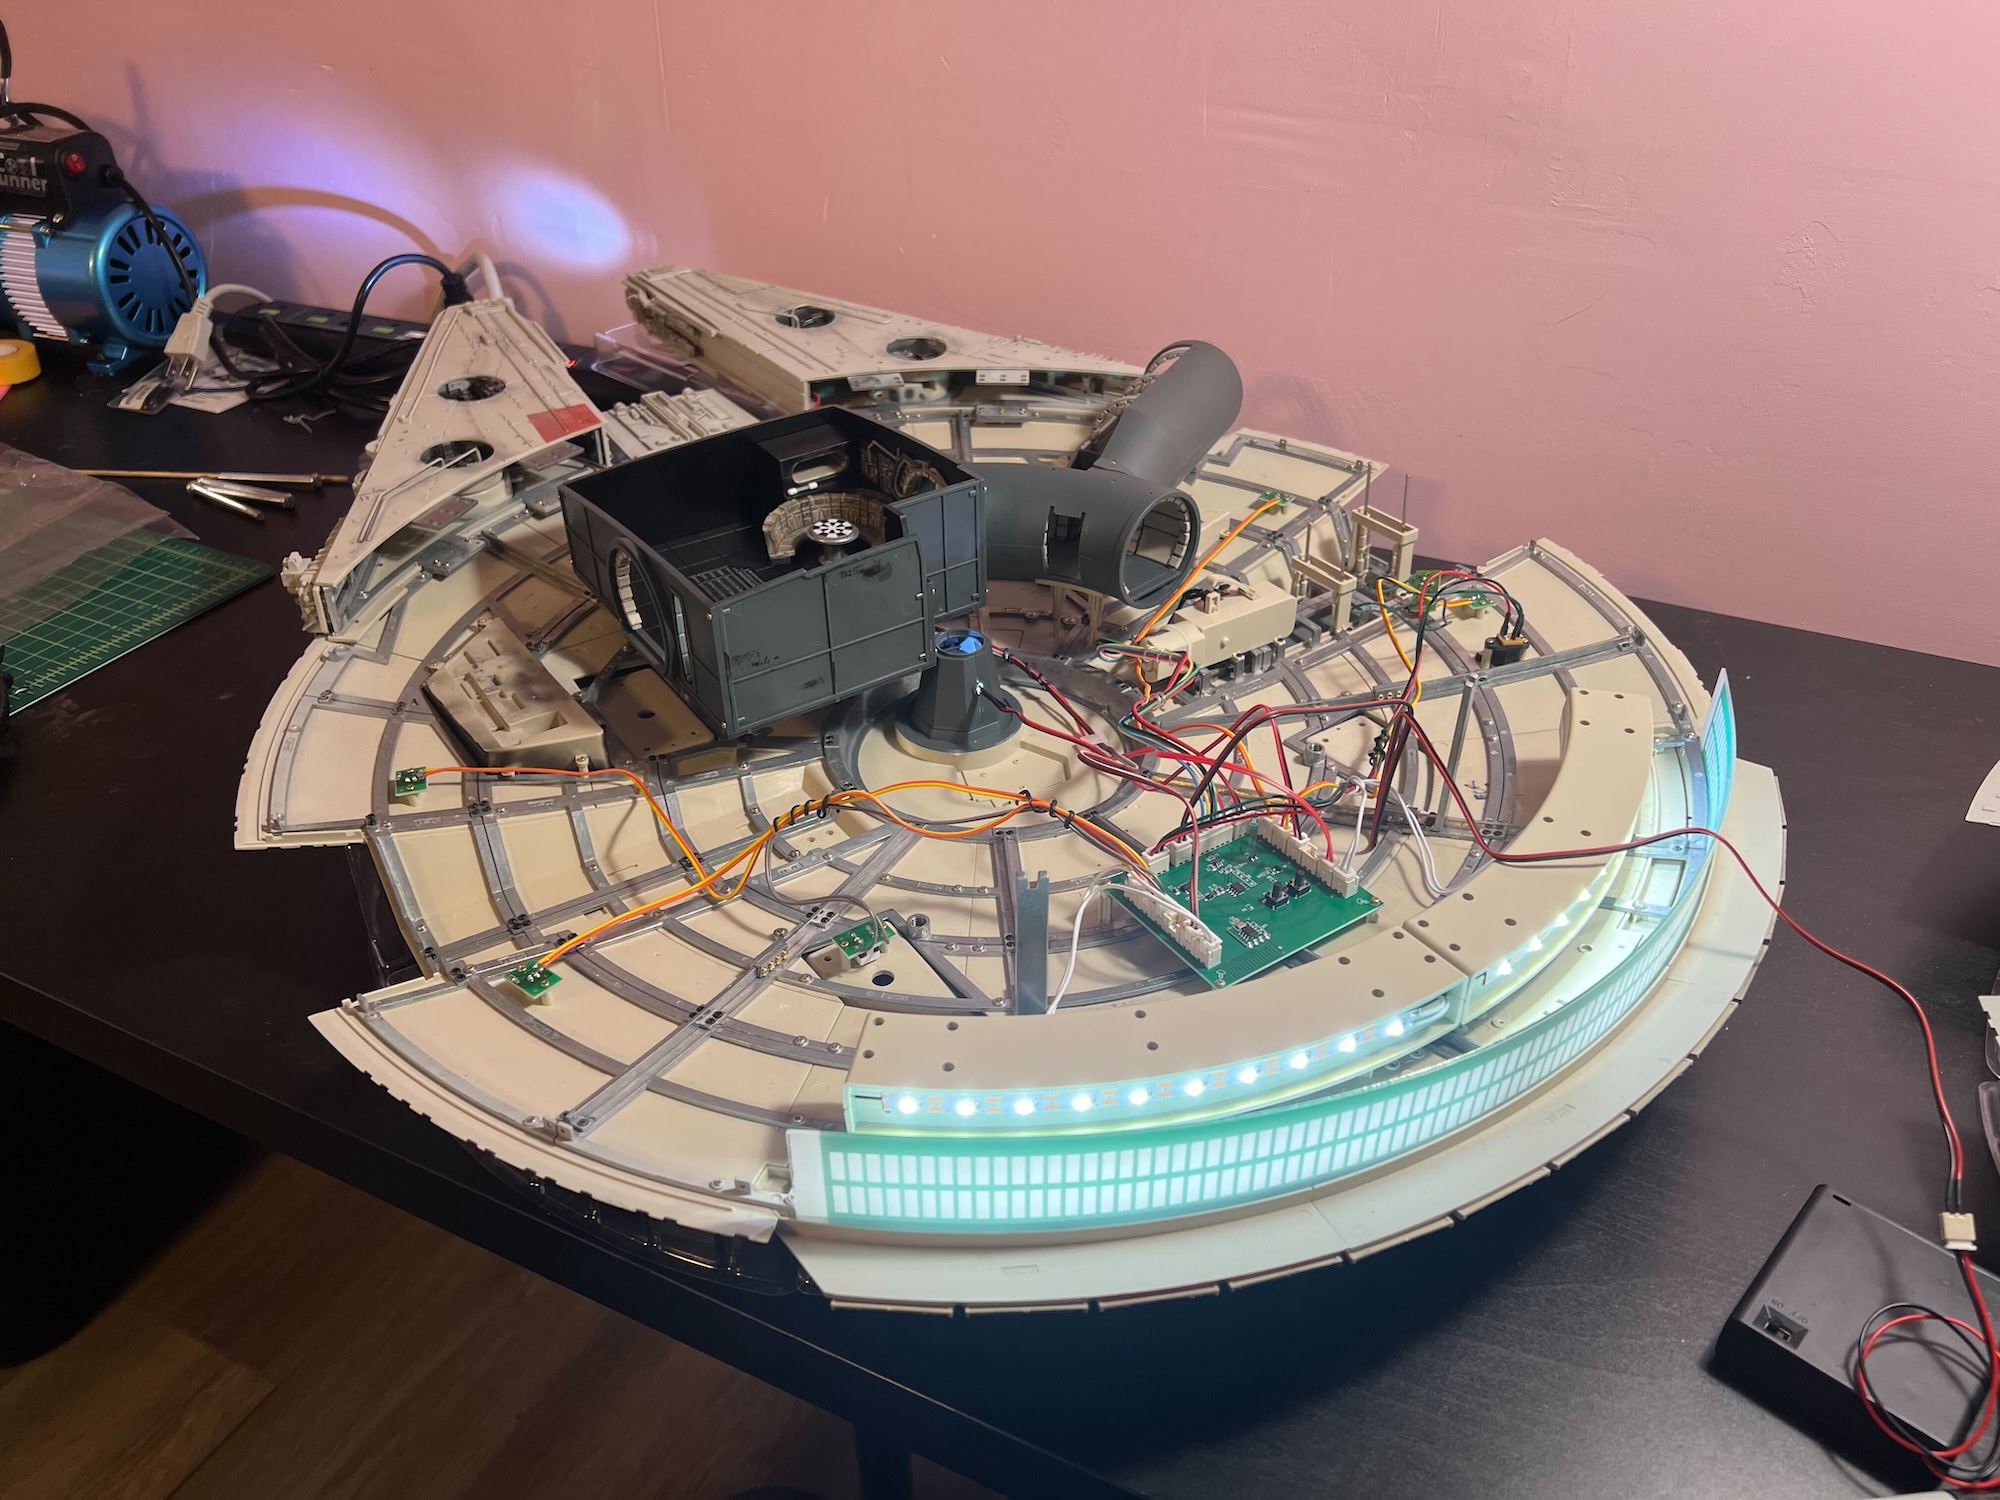
With the exterior in much better shape, it was time to rig up more lighting and test everything out. I got the headlights in the mandibles plugged in, the engine LED strips, the turrets, cockpit lights, and landing lights all wired up, then did a test with the battery pack installed. Everything was perfect.
October 22nd, 2025
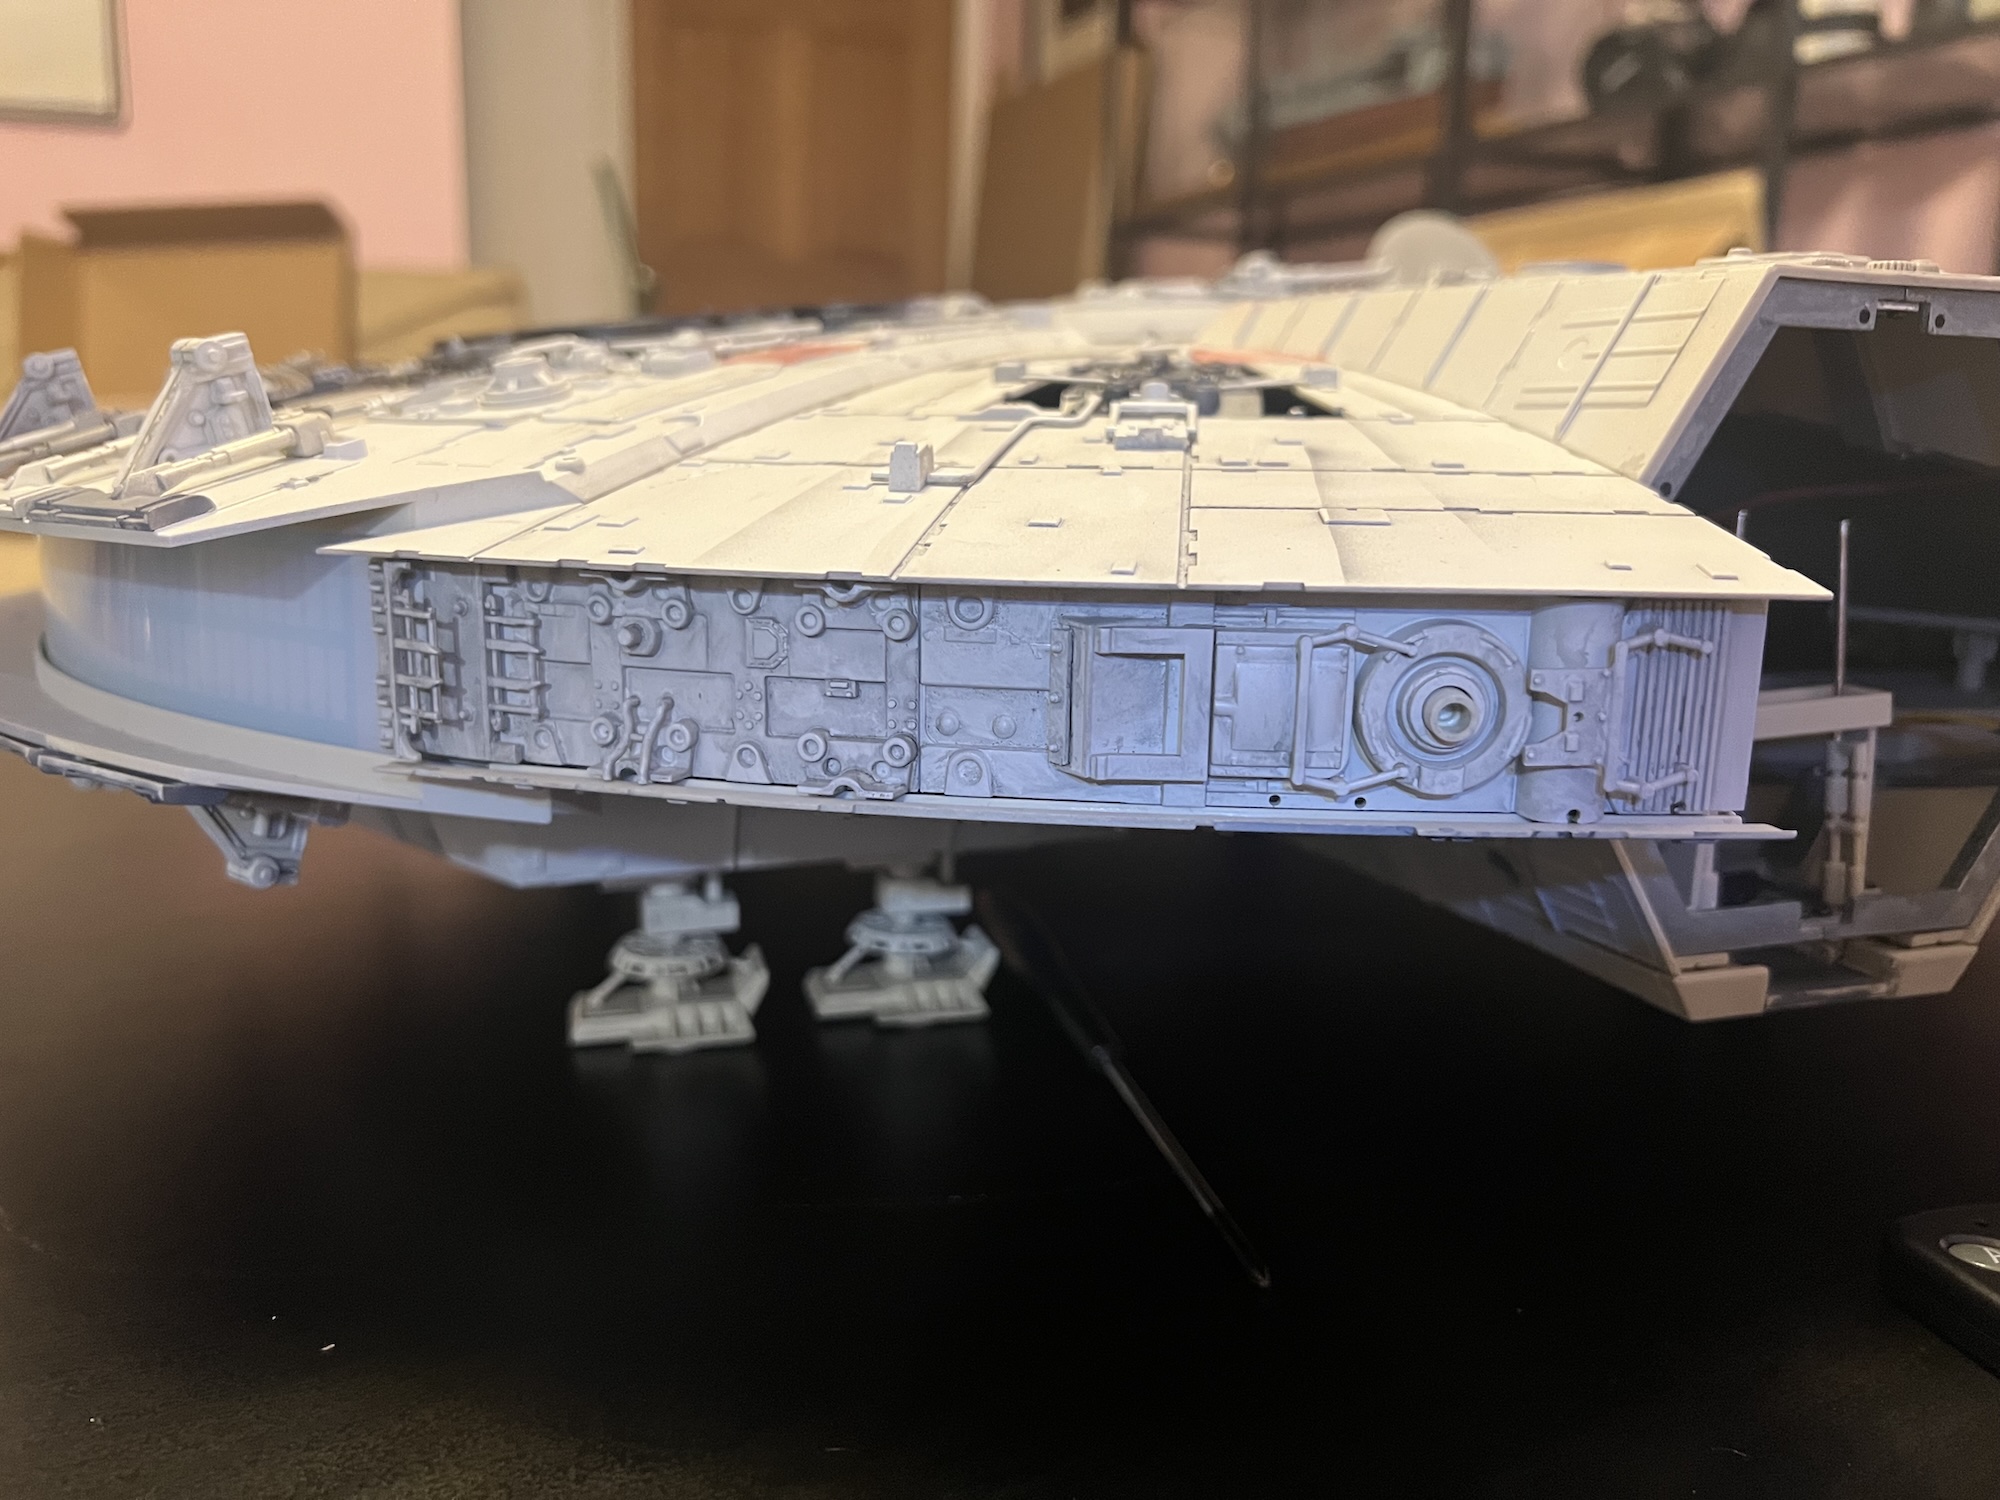
I received the final box only to find it was missing Issue 99. I hadn't opened the previous box at that point, so I was dismayed to find that the previous box was missing Issue 92 as well. I immediately put in a support request and had to wait. Issue 92 had the last two side frame pieces which meant I couldn't mount the top to the base yet. In the meantime I was able to get the landing gears from Issue 100 assembled and at least get the bottom up off the assembly jig. There is a trigger in the landing gear well which triggers the landing lights, so if you mount the model in the flying position they won't turn on. I moved the lower half over to the coffee table I got specifically for it and made sure everything was working properly.

October 29th, 2025
After what seemed like an eternity waiting, a few impatient emails to customer service, the final box arrived.
I scooped the box up off the porch and then unfortunately had to finish my work day before tearing into it. As soon as 5 hit, I opened it up and found Issues 92 and 99. I mounted the last two frame pieces then it was time for the moment of truth. As smoothly as I could I took the top half and guided it down onto the bottom, lining up the tabs to the frame, and then started to screw the two halves together. Surprisingly, the hardest part of the entire build was guiding the two screws into the frames right between the mandibles - you had to angle the screwdriver just right, and of course they kept popping off the screwdriver or just not catching the threads. After a half hour of sweating and some choice words I got the top fully screwed down. Once last check of the wiring and it was time to get the engine bay cover on.
Everything was pretty much ready for final assembly. The main on/off switch is creatively hidden behind a greeblie just behind the starboard airlock, you can see it in the right side of the photo below. All the side panels simply snap into the metal frames and with a dab of glue are in place.
Mounting the rear engine cover was tricky because for some reason they use plastic screws with a hex head, and they barely caught. I had to be extremely careful to not strip either the head or the threads, but I was able to get all six in. After that, there were a few greeblies left that overlapped the upper hull and the mandibles. The last part was going in with an ultra-fine tip sharpie and applying the dozens of "hash marks" that dot the hull.
Two long years of work done. It's an amazing kit and I am proud of the results. I am going to get a mirror made for it to sit on so you can see the lower hull better, and then just see how it looks in my office for a while before I decide if I should weather it any more. I think the engine bay smoke is a bit heavy handed but I am really happy with everything as it is right now.